Thanks to developer solohsu for providing some of the unofficial Android 10 EdXposed module (Xposed) support initially. It’s based on the Riru platform developed by RikkaW. Now, the EdXposed fully supports Android 10 which is a good thing for all the customization lovers. However, you can expect some of the bugs which would be solved very soon.
Xposed Framework – Overview
The Xposed is a popular and useful framework that offers plenty of modules for customization on your Android devices. Therefore, you will be able to install and use modules like Gravity box, Navbar, Greenify, BootManager, Flat Style Colored Bars, etc. Some times, users prefer rooting their devices only. But if you can’t use Xposed modules on your device, only rooting can’t do any benefit.
Android 10 – Overview
While talking about Android 10, it’s the latest Android OS version that was launched a couple of months ago. The Android 10 version brings so many useful features that you just can’t skip such as Dark Mode (system-wide), Gestures Navigation, Live Caption, Focus Mode, Family Link, 5G support, App Permissions, Location Privacy Control, Foldable Device support, Easy Security Updates, Sound Amplifier, etc.
Steps To Install Xposed Framework on Android 10
After rooting your Android device, the Xposed framework gives an option to install any Xposed modules on your phone whatever you like to do with the system. If you don’t know, you can’t install the Xposed Framework or module via a custom recovery on your device. You can do it using EdXposed which works really well on Android 9.0 or higher devices. Now, before heading over to the steps, make sure to follow the pre-requirements at first.
Pre-requirements
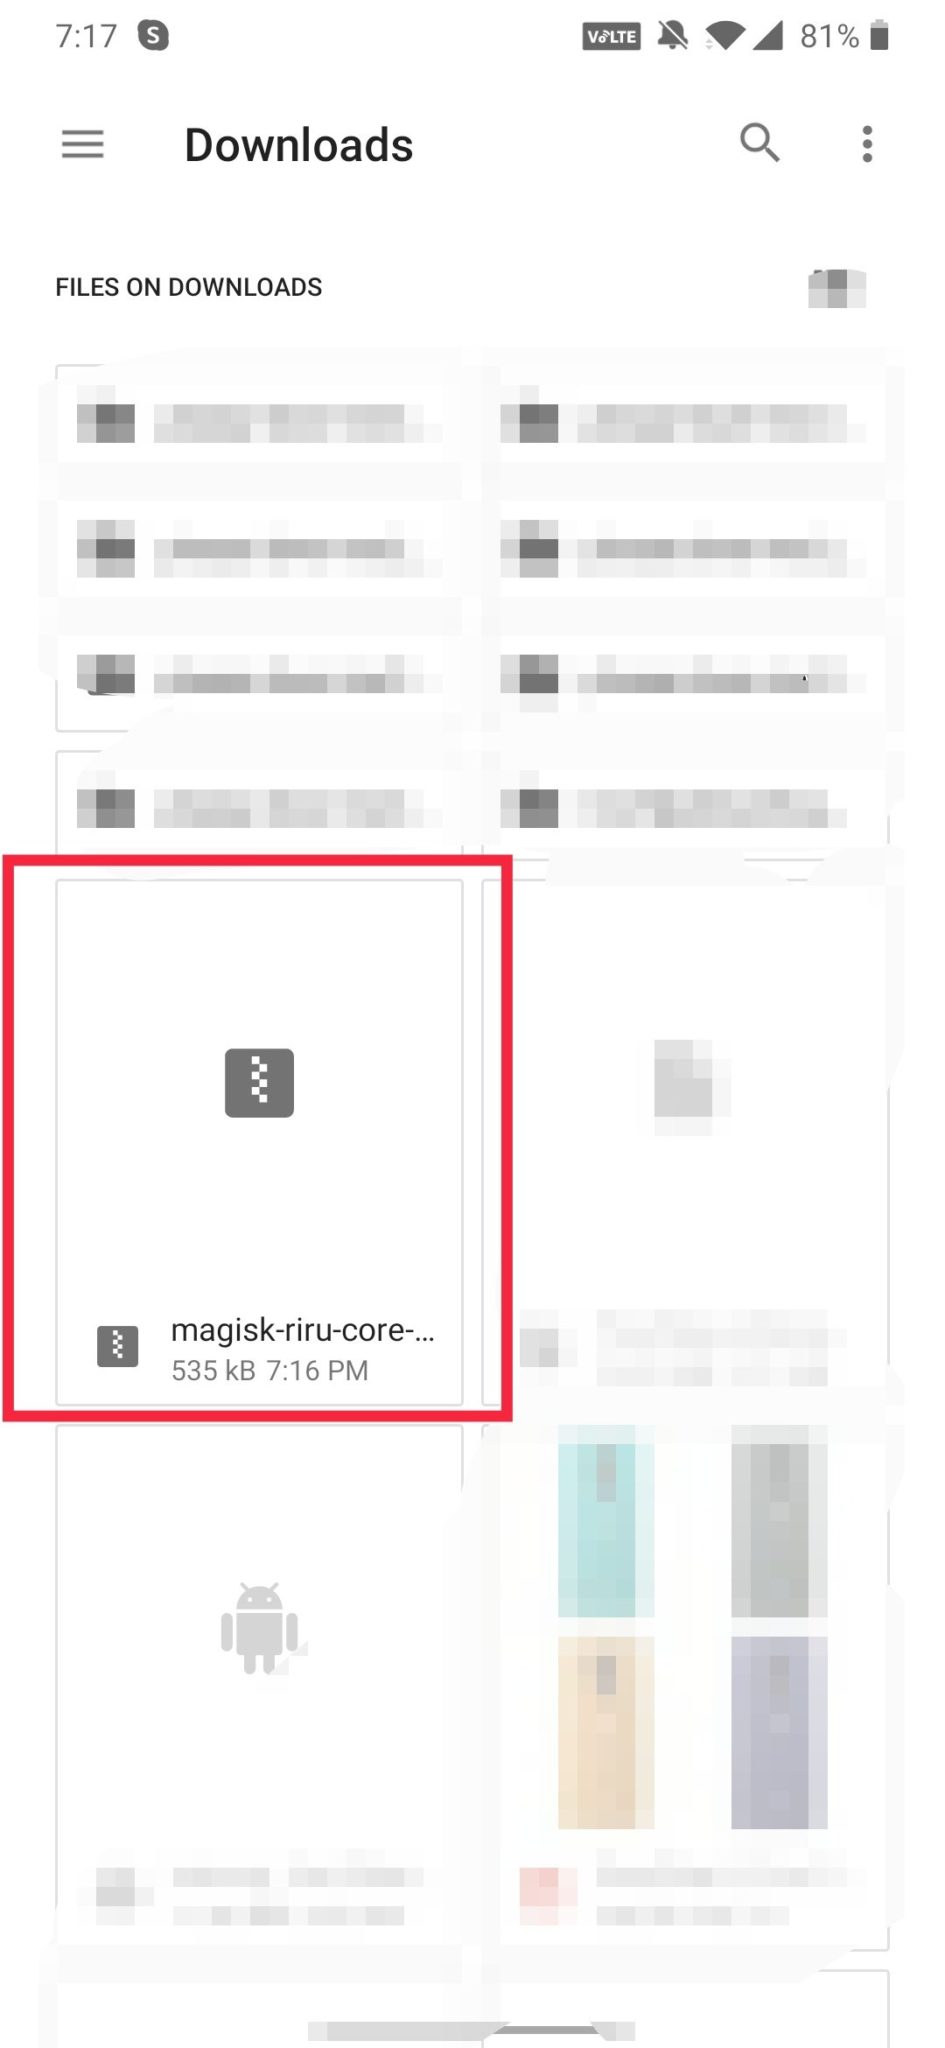
The Android 10 running device should be rooted at first. Install Magisk and Magisk Manager on your phone. The device should be charged 50%-60% minimum. Fully backup your device at first (such as important documents, files, messages, contacts, app data, media files, etc). You need to download the Magisk Riru Core zip file. Download EdXposed YAHFA (zip) and EdXposed Sandhook (zip). Download EdXposed Installer
Installation Steps
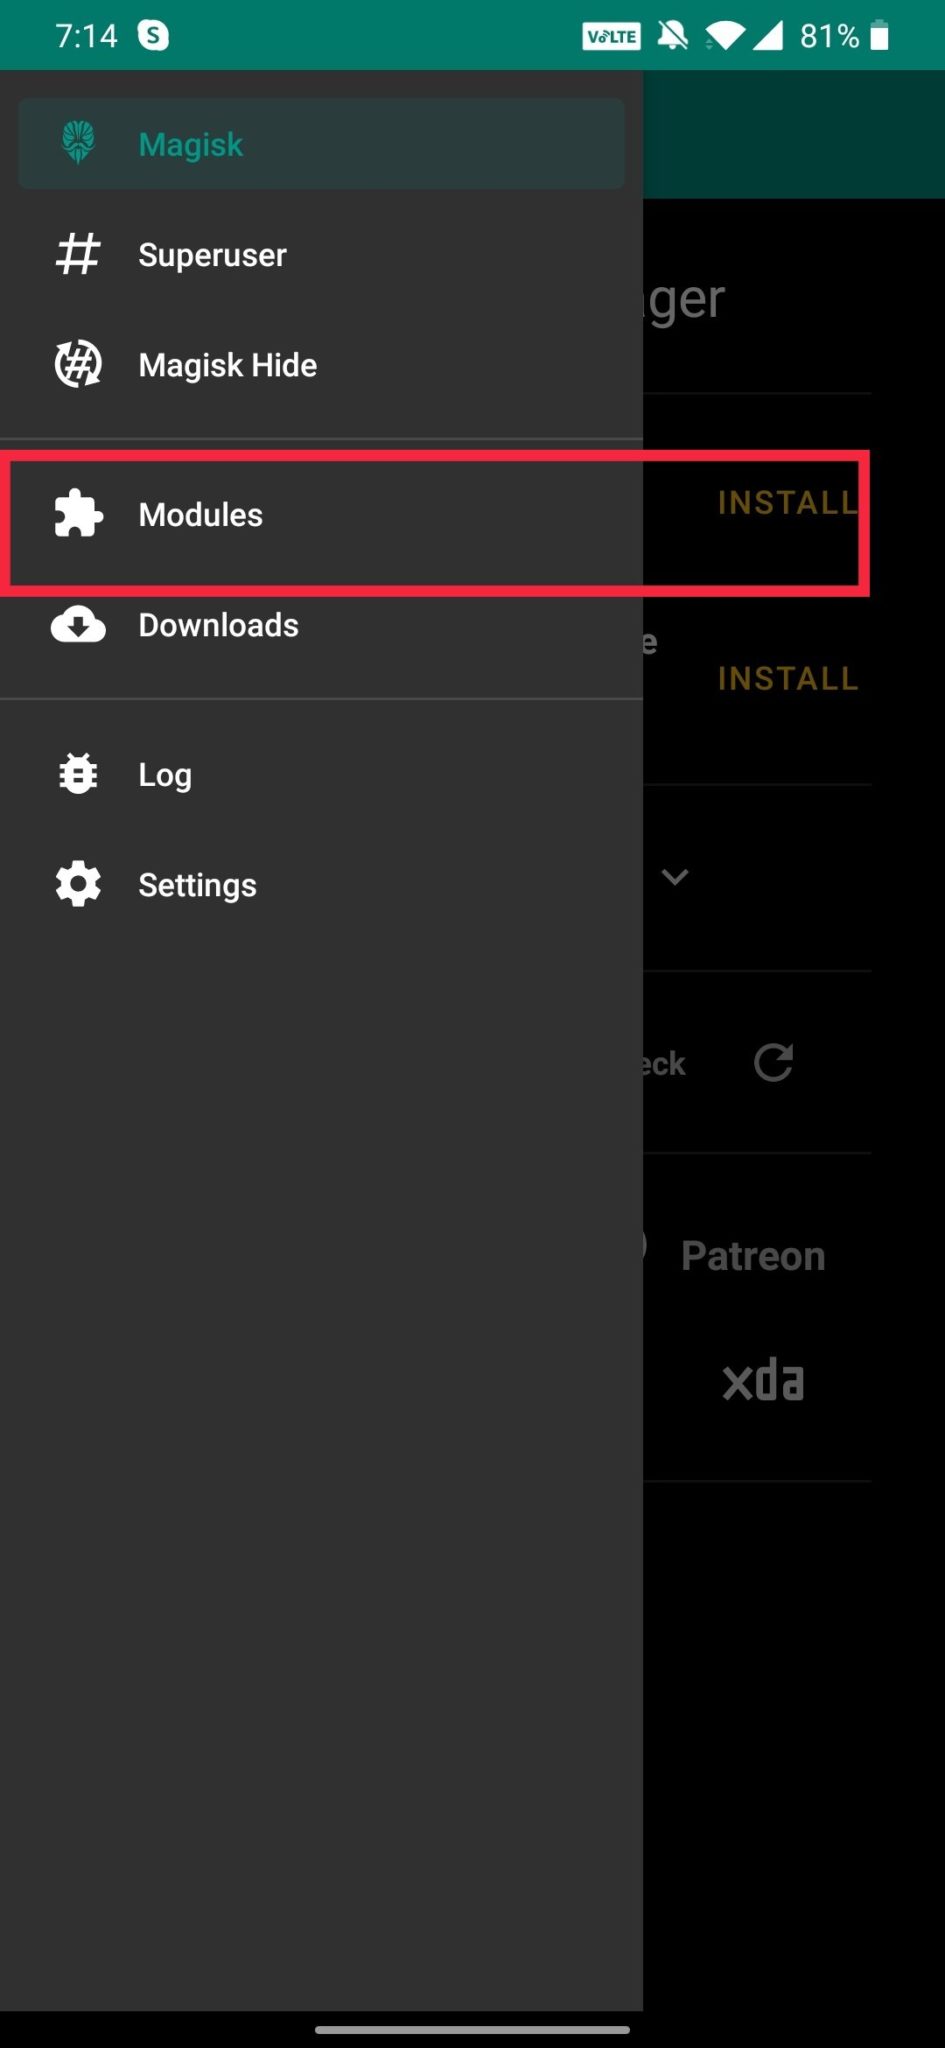
Copy & paste all the downloaded files on your phone storage. Launch the Magisk Manager app on your device -> Tap on the Hamburger icon (three bars) on the upper-left corner
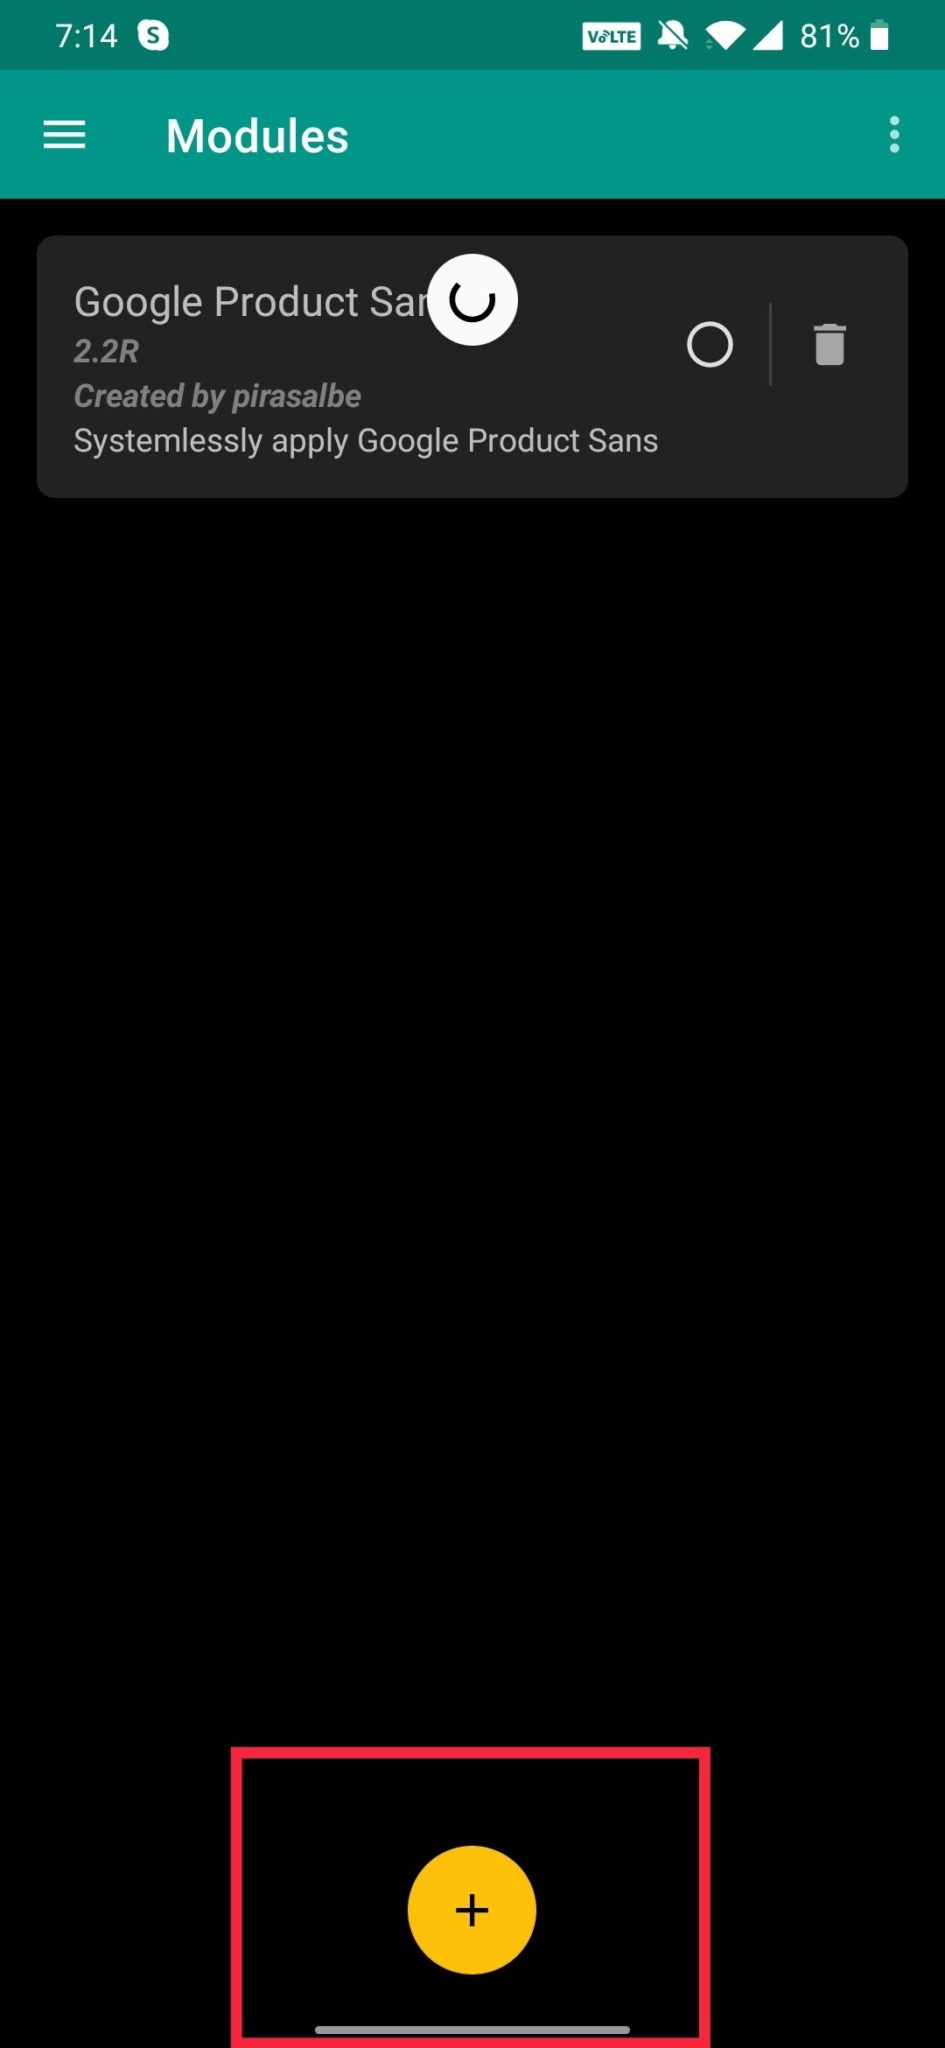
Then > Tap on Modules -> Tap on (+) icon.
Now, add the Riru Core zip file from the storage location.
The Riru Core module will be installed automatically.
Next, tap on (+) button again -> Select and Install the EdXposed YAHFA module. Tap on Reboot your device -> Your device boot. Then open the File Manager app -> Head over to the folder where you’ve copied all the files earlier. Tap on EdXposed Installer and install it. You will see EdXposed Status enabled with a green tick on the EdXposed Manager app. That’s it.
Note: If the EdXposed isn’t enabled on your device, then delete both the modules from Magisk. Now, follow the installation steps again and install the EdXposed Sandbox instead of the YAHFA module (see step 5). We hope you’ve installed the Xposed Framework on your Android 10 very easily. Official Source